
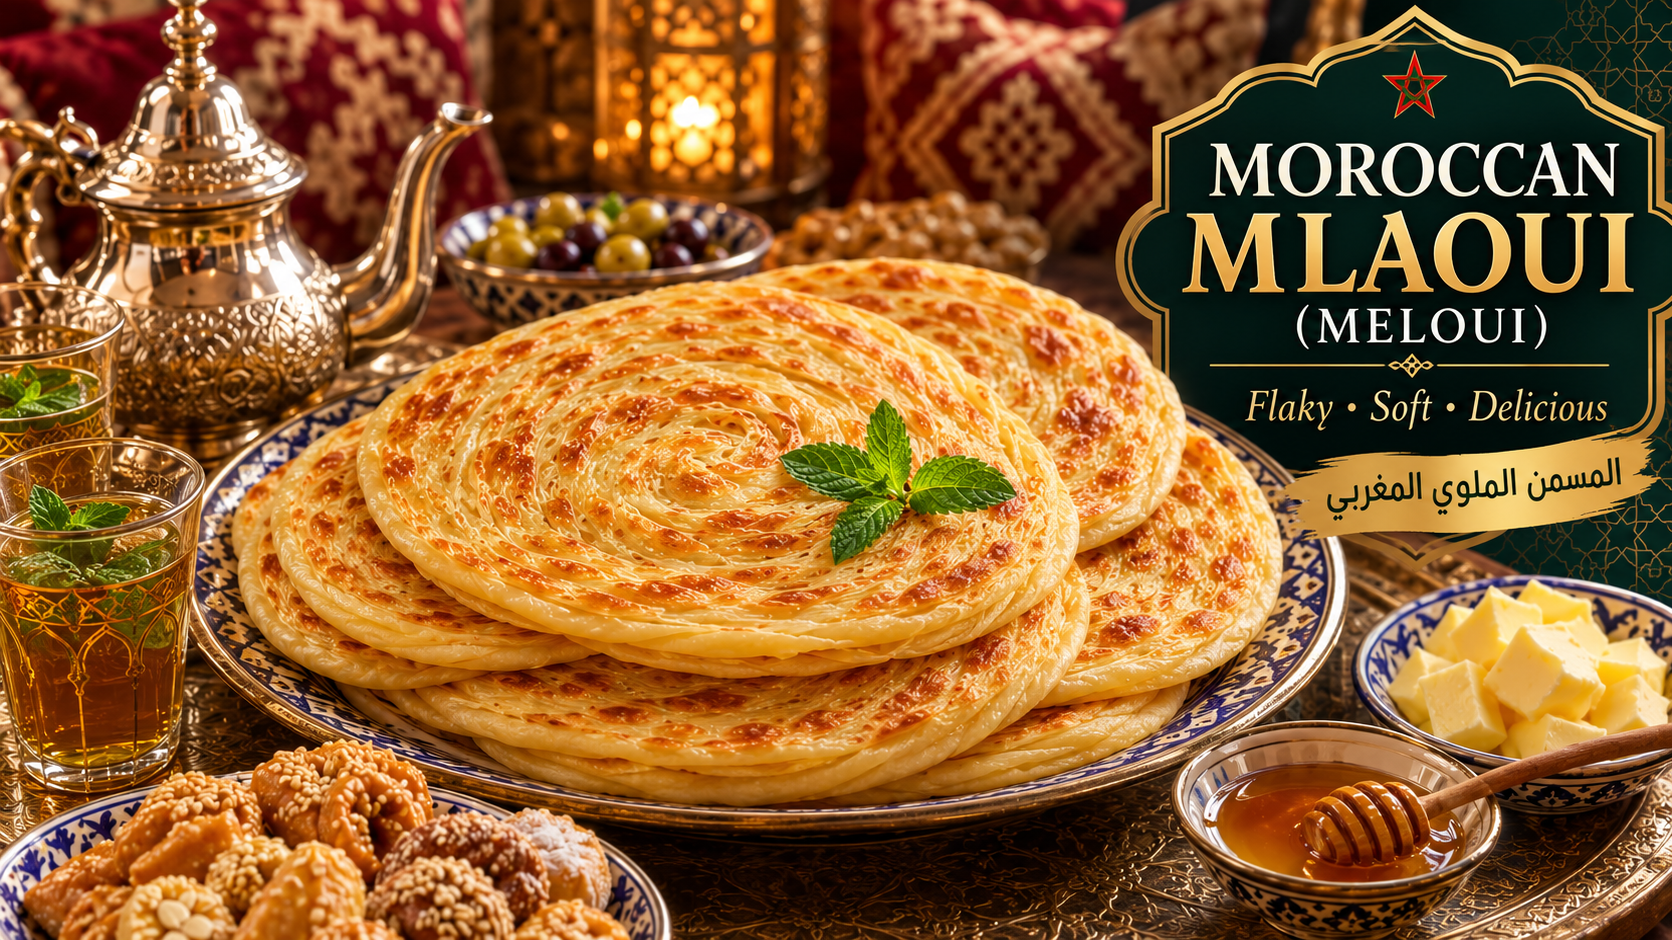
Moroccan Mlaoui, also known as Meloui, is one of Morocco’s most beloved traditional flatbreads, famous for its delicate flaky layers, crispy golden exterior, and soft, tender center. Carefully folded and pan-cooked until perfectly crisp, this iconic bread is a staple of Moroccan breakfasts, afternoon tea, and family gatherings.
Made with simple pantry ingredients such as flour, semolina, water, salt, and oil, Mlaoui transforms into a rich, buttery bread thanks to its unique folding technique. It can be enjoyed warm with honey, butter, jam, cheese, or served alongside a refreshing glass of traditional Moroccan mint tea.
In this authentic Moroccan Mlaoui recipe, you’ll learn step by step how to create perfectly layered, soft, and flaky flatbreads at home using traditional methods. Whether you’re discovering Moroccan cuisine for the first time or recreating a family favorite, this recipe will help you achieve bakery-quality Mlaoui with ease.
Recipe Information:
| Information | Details |
|---|---|
| Prep Time, rest time | 15 minutes, 30 minutes |
| Cook Time | 40 minutes |
| Total Time | 1h 25 minutes |
| Servings | 20–25 pieces(Depending on the size of the dough balls) |
| Cuisine | Moroccan |
| Difficulty | Easy |
Ingredients:
- 500g of white flour
- 500g of very fine fino semolina
- A tablespoon of honey 20g
- A teaspoon of yeast
- A teaspoon of salt
- 2 bags of sweet yeast(One for the dough and one for preparation)
- To make lush mesmen I need to
- 50g softened butter
- And a cup of vegetable oil (I need these two ingredients during preparation, not in the dough)

Instructions:
Step 1: Prepare the Dough
In a large mixing bowl, combine the white flour, very fine semolina, instant yeast, salt, and honey. Gradually add the warm water while mixing until a soft, smooth dough forms. Knead the dough for 10–15 minutes until it becomes elastic, silky, and no longer sticks to your hands.
Tip: Add the water gradually. Depending on the flour, you may need about 400–430 ml of warm water to obtain a soft dough.
Step 2: Rest the Dough
Lightly grease the dough with vegetable oil, cover it with plastic wrap or a clean kitchen towel, and let it rest for 10–15 minutes. This short resting time relaxes the gluten, making the dough much easier to stretch into very thin sheets.
Step 3: Divide into Dough Balls
Grease your hands with a little vegetable oil and divide the dough into equal-sized balls (about 80–100 g each, depending on the size you prefer). Arrange them on an oiled tray, coat them lightly with oil, cover them, and let them rest for another 15–20 minutes.
Step 4: Prepare the Layering Mixture
In a small bowl, mix:
- A small amount of very fine semolina (fino)
- 1 packet of baking powder
Keep the melted butter in a separate bowl and the vegetable oil nearby. These ingredients will be used during shaping to create the famous flaky layers.
Step 5: Stretch the Dough
Lightly oil your work surface. Place one dough ball in the center and gently flatten it with your hands. Stretch it carefully from the center outward until you obtain an extremely thin, almost transparent sheet without tearing it.
Step 6: Create the Flaky Layers
Brush the entire dough sheet generously with the melted butter, then drizzle a little vegetable oil over the surface. Evenly sprinkle the fine semolina and baking powder mixture across the dough.
Fold the dough into a long rectangle by folding both sides toward the center. Brush each fold with a little melted butter and lightly sprinkle more of the semolina mixture between the layers. Fold the strip again into a compact square while repeating the same process between each fold.
This layering technique is what gives Moroccan Mlaoui its delicious flaky texture.
Step 7: Rest the Folded Dough
Arrange the folded squares on a lightly oiled tray. Cover them with a clean towel and allow them to rest for 10–15 minutes. This final resting period helps preserve the layers and makes the dough easier to flatten before cooking.
Step 8: Flatten the Mlaoui
Using your fingertips, gently flatten each square into a round or square shape about 5–8 mm thick. Be careful not to press too hard so the delicate layers remain intact.
Step 9: Cook Until Golden
Heat a heavy skillet or cast-iron pan over medium heat. Place one Mlaoui onto the hot pan and cook for 2–3 minutes per side, turning several times until both sides become golden brown, crisp, and beautifully layered.
Press gently around the edges while cooking to ensure even browning and fully cooked layers.

note:
You can use the same dough for msemen and transform it into the trid (Moroccan trid bread) for the Rbâz recipe.=> Discover the method by opening the information below.
Show How to prepare the special Moroccan bread recipe using msemen dough for Rbaz recipe
How to Make Moroccan Trid (Bread for Rbâz)
Moroccan trid is made using the same dough as Moroccan Mloui (Meloui). Instead of folding the dough into layered rounds, each dough ball is stretched into a very thin sheet and cooked gently on a hot griddle until just done. The bread should remain soft and flexible—not crispy—so it can absorb the flavorful broth when preparing traditional Moroccan Rbâz.
Step 1 – Prepare the Dough
Prepare the same dough used for Moroccan Mloui. After kneading, let the dough rest until smooth, soft, and elastic.
Step 2 – Divide the Dough
Divide the dough into equal balls (about 80–100 g each). Lightly coat them with vegetable oil, cover, and let them rest for 15–20 minutes.
Step 3 – Stretch the Dough
Lightly oil your work surface and your hands.
Using your fingertips, gently press and stretch each dough ball exactly as shown in Step 5 of the Mloui method until it becomes very thin and almost transparent.
Do not fold or roll the dough.
It should remain as one large, thin sheet.
Step 4 – Cook the Trid
Heat a flat griddle or heavy skillet over medium heat.
Transfer the stretched dough carefully onto the hot surface.
Cook each side just until fully cooked.
Do not let it brown too much or become crispy.
The trid should remain:
- Soft
- Flexible
- Moist
- Easy to tear
This texture is essential because it will later absorb the chicken broth.
Step 5 – Repeat the Process
Continue stretching and cooking the remaining dough balls in the same way.
Stack the cooked trid sheets on top of one another and cover them with a clean kitchen towel to keep them soft.
Step 6 – Chop the Trid
Once all the trid sheets have cooled slightly, stack them together.
Using a sharp knife or kitchen scissors, cut them into small irregular pieces, just like the traditional trid used in Moroccan Rbâz.
You should obtain approximately 1 kg of chopped trid, ready for assembling the dish.
Step 7 – Ready for Moroccan Rbâz
Your homemade Moroccan trid is now ready.
Use it to prepare Moroccan Rbâz by soaking it with the aromatic chicken broth and layering it with caramelized onions, roasted chicken, and hard-boiled eggs for an authentic traditional Moroccan feast.
Chef’s Tip
For the best authentic texture, avoid overcooking the trid. It should stay soft, tender, and slightly moist, allowing it to absorb the flavorful broth while maintaining its delicate layered texture in the finished Rbâz dish.

Step 10: Serve and Enjoy
Serve the Mlaoui warm while it’s still crispy on the outside and soft inside. It is traditionally enjoyed with Moroccan mint tea, honey, butter, jam, cheese, or olive oil. Thanks to its delicate flaky layers and buttery texture, it makes a perfect breakfast, afternoon snack, or accompaniment to your favorite Moroccan meals.
Chef’s Tip: For extra flaky Mlaoui, avoid using too much semolina between the layers, always brush each fold with melted butter, and let the dough rest whenever it begins to resist stretching. Patience during folding and resting is the secret to perfectly layered Moroccan Mlaoui.

Show Nutritional value of this recipe

Frequently Asked Questions:
1. What is Moroccan Mlaoui (Meloui)?
Moroccan Mlaoui, also known as Meloui, is a traditional Moroccan layered flatbread famous for its crispy golden exterior, soft interior, and delicate flaky layers. It is commonly served for breakfast, afternoon tea, or as a side with Moroccan meals.
2. What is the difference between Mlaoui and Msemen?
Although they are similar, Mlaoui is usually rolled into a round spiral before being flattened and cooked, giving it visible circular layers. Msemen, on the other hand, is folded into a square shape, resulting in a different layered texture.
3. Why is my Mlaoui not flaky?
The most common reasons are:
- The dough wasn’t kneaded enough.
- Not enough melted butter and oil were used between the layers.
- The semolina mixture wasn’t sprinkled evenly.
- The dough wasn’t rested long enough before stretching and cooking.
4. Can I make the dough in advance?
Yes. You can prepare the dough, divide it into balls, lightly coat them with oil, cover them tightly, and refrigerate them for up to 24 hours. Let the dough come to room temperature before shaping.
5. Why should the dough be very soft?
A soft, well-hydrated dough stretches more easily into a very thin sheet without tearing, which is essential for creating the many delicate layers that make authentic Moroccan Mlaoui.
6. Can I freeze Moroccan Mlaoui?
Yes. You can freeze either the uncooked folded dough or the fully cooked Mlaoui. Store them in an airtight freezer bag with parchment paper between each piece for up to 2 months.
7. How do I reheat Mlaoui?
Reheat it in a hot skillet over medium heat for 1–2 minutes per side until warm and crispy. Avoid microwaving if you want to preserve its flaky texture.
8. What should I serve with Moroccan Mlaoui?
Mlaoui is traditionally served with:
- Moroccan mint tea
- Honey
- Butter
- Olive oil
- Jam
- Soft cheese
- Amlou
- Fresh olives
9. Can I use only flour without semolina?
Using only flour is possible, but authentic Moroccan Mlaoui is made with a combination of white flour and very fine semolina. The semolina helps create the characteristic chewy texture and flaky layers.
10. Why is baking powder added to the semolina mixture instead of the dough?
Many Moroccan home cooks mix a small amount of baking powder with the fine semolina used between the layers. During cooking, it helps separate the layers slightly, creating a lighter, airier, and flakier Mlaoui.
11. What type of pan is best for cooking Mlaoui?
A heavy non-stick skillet, cast-iron pan, or traditional flat griddle works best because it distributes heat evenly and produces a beautifully golden, crispy crust.
12. How do I know when the Mlaoui is fully cooked?
The bread should be golden brown on both sides with crisp, flaky layers on the outside while remaining soft and tender inside. Turn it several times during cooking to ensure even browning.


Leave a Reply